Kaspa is a cryptocurrency project that prioritizes high-speed transactions and scalability. It utilizes a unique consensus mechanism called the GHOSTDAG protocol, which enables parallel blocks to coexist and be ordered in consensus. This is unlike traditional blockchains that form a single chain.
In this section, we provide news, updates, technical analyses, and discussions related to the Kaspa project, including development updates, community activities, and market performance.
In the latest time, Kaspa and Polkadot have been dealing with a setback by the Bitcoin crash. The crash in Bitcoin significantly affected various kinds of cryptocurrencies and stirred up the market, which influenced projects such as Kaspa and Polka Dot.
Kaspa was believed to be a breath of fresh air when it was endorsing new blockchain technology solutions. The features like speedy transactions and adaptive ability has lost its direction. Similarly, the Polkadot has declined as well. It’s main idea is to let multiple blockchains work in harmony, but it has declined as well. These environments were negative due to the general downturn in the cryptocurrency markets. This exerted pressure on projects to make incremental investments and continue their upward trajectory.
Nonetheless, RollBlock has managed to stand out with the problems faced by Kaspa and Polkadot. RollBlock is a promising token in the blockchain sector that indicates stable growth and high resistance to market fluctuations. It has sustained its position successfully in the market employing such solutions and strategies for its workings while other cryptocurrencies are struggling.
This is an appropriate time to address the risks involved, owing to the instability of the market seen in the current cryptocurrency market. Since Bitcoin and significant crypto-assets come with volatility, Kaspa, Polkadot and others are endeavouring to overcome such adversities. These blockchains needs to stabilize and start their upward journey again.
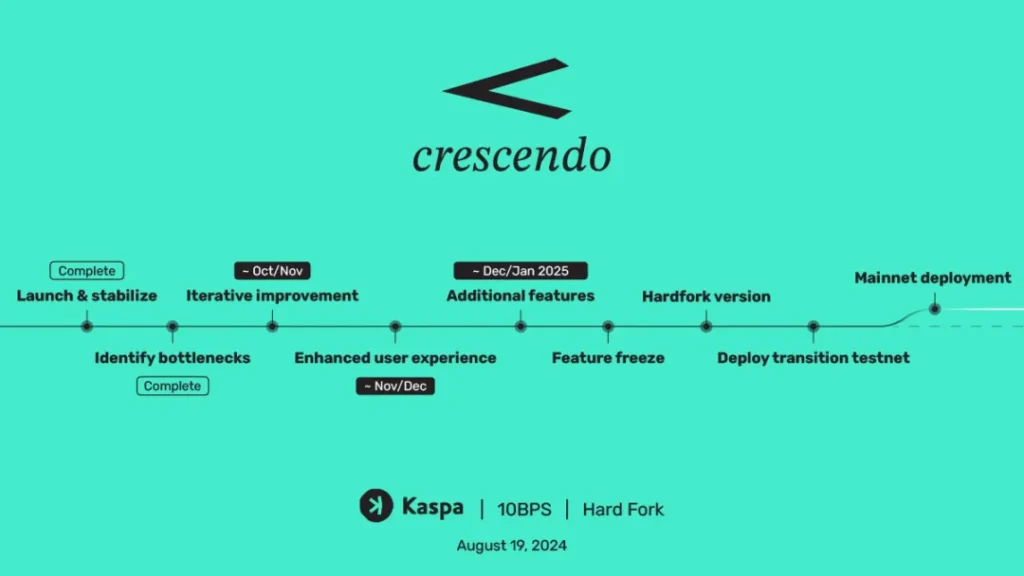
On the 19th of August, 2024 Kaspa made a remarkable development in its network capabilities. It announced the “Crescendo” hard-forked roadmap. Shortly after the effective implementation of Rusty Kaspa (RK) node software, the Kaspa Network rapidly adopted it.
It led to miners using RK nodes for about 97% of Kaspa blocks. It shows a rampant acceptance by the Kaspa network. The transition will be able to increase the block rate of the network from 1 to 10 blocks-per-second(BPS).
Roadmap to the hard-fork
The official Kaspa account specifies some key phases in the process of this significant change. They are mentioned below:
Launch & stabilize
Launch a testnet with the desired block rate and related network settings, and work on stabilizing it. TN11, the existing 10-BPS Kaspa testnet allowed to accomplish it. It has been operational since January 7, 2024. (Done)
Identify bottlenecks
Iteratively identify processing bottlenecks and make performance optimizations to lower the hardware specifications required for running a node. (Done)
Iterative improvement
Repeat the above until the minimal specs are affordable enough. Also, low enough to satisfy the decentralization required for the mainnet. (We are here, getting close to the convergence of this optimization loop. Approximate timeline: ~2 months from now.)
Enhanced user experience
After settling performance requirements. The team perfects the node software to the level of user experience required by mainnet operators. They address some minor problems that can be neglected in a testnet setting (~3 months from now). (Next)
Additional features
Implement any additional hardfork features and deploy them on TN11. (Target timeline: ~4–5 months from now. Some features might be excluded to fit the timeline.)
Feature freeze
Hardfork version
Implement the hardfork transitioning version
Deploy transition testnet
Deploy the transition version on TN10 (1 BPS testnet) to simulate the mainnet transition.
Mainnet deployment with hardfork transitioning activated 1–2 months later
With the unveiling of the “Crescendo” hard fork Kaspa aims to gain accelerated transaction handling. It also ensures network stability and security.
If you liked this article, then please subscribe to our YouTube Channel for web3video tutorials. You can also find us on Twitter and Instagram.
Creating a Kaspa wallet is the first baby step, to securely manage and store your Kaspa currency. If you’re wondering how to create a Kaspa wallet, you’ve come to the right place.
In this article, we’ll guide you step-by-step on how to create a Kaspa wallet. If this is your first time setting up any crypto wallet, you’ll find this guide especially helpful.
So, let’s get started!
What is Kaspa?
Kaspa is a decentralized cryptocurrency system, with an emphasis on its potential scalability and its speed.
It is built on a blockDAG (Directed Acyclic Graph) protocol, and this enables it to work on different blocks at a time. This feature allows Kaspa to set high TPS without the loss of decentralization and security.
The growing recognition of Kaspa has brought the attention of the crypto users to have their Kaspa wallets to save, transfer and accept Kaspa tokens.
Before plunging into the process of creating the Kaspa wallet, it’s important to know what exactly a Kaspa wallet is.
Kaspa wallets are the digital form of our physical wallets where we store, send, and receive the money but instead of physical money, we transact with the Kaspa (KAS) cryptocurrency.
Since we understood what a Kaspa wallet is, we now dive into the different types of Kaspa wallets.
Types of Kaspa Wallets
Desktop Wallets
The first type is Desktop Wallets. These wallets can easily be downloaded and installed on your computer as a software application. For the most part, they are perfect for users who regularly need to access their Kaspa tokens from a computer. In addition to having features like transaction history, synchronization with the Kaspa network, and total control over private keys, they are renowned for their high level of security.
Mobile Wallets
Next up, we have Mobile Wallets.
As its name suggests they are portable wallets that can easily be installed on our smartphones. Its main feature being portability it provides users with convenience and allows them to access their Kaspa tokens on the go. It also provides good security with its biometrics as well as pin codes.
Hardware Wallets are physical devices that store Kaspa (KAS) private keys offline, protecting against hacking. They offer high security with features like PINs and recovery phrases, giving users full control of their funds. Hardware wallets are compatible with many cryptocurrencies and are ideal for long-term, secure storage.
Web wallets are browser-accessible online services that let users transfer, receive, and save Kaspa (KAS). They do not require any installation. They are more hacker-friendly due to the internet storage of private keys, they are less secure than desktop or hardware wallets despite being more convenient.
Paper Wallets are a tangible document that serves as a safe, impenetrable means of long-term storage for public and private keys of Kaspa(KAS).
A string or QR code is frequently printed with the private key. Although it is secure from cyberattacks, it still needs to be guarded from physical harm and theft because misplacing the paper could mean losing money.
This is a cheap, easy solution, but security depends on how it is handled.
The first thing you need to do is to find the type of wallet that is suitable for you. Here we will be generating a desktop wallet which is considered to be highly secure.
But today in this article we are going to see how you can create a kaspa wallet using the web.
Step 2: Download the Wallet Software
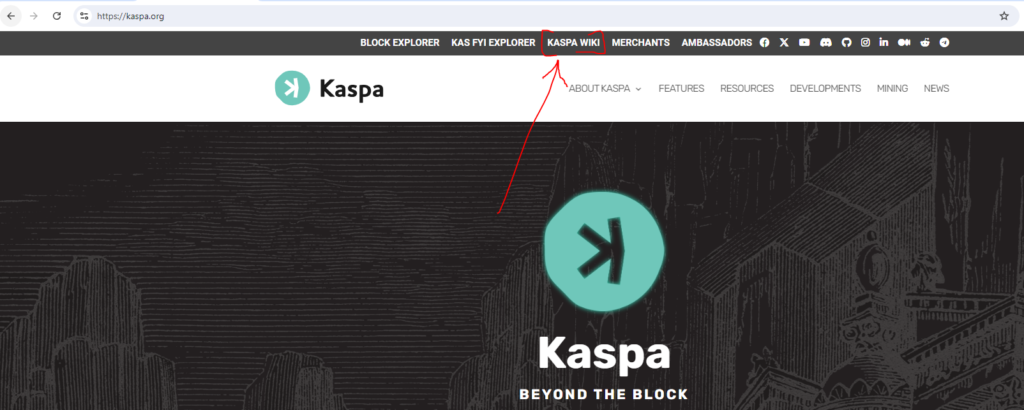
We will begin by visiting the official Kaspa website (kaspa.org) to guarantee that we get the privileged and most secure wallet programming.
In the left sidebar of the Kaspa Wiki, find and click on the “Tools” option. In the Tools section, select “Wallet” to proceed.
We’ve already discussed hardware, software, paper, and mobile wallets above in the article but today, we will focus on the setup steps for a software wallet.
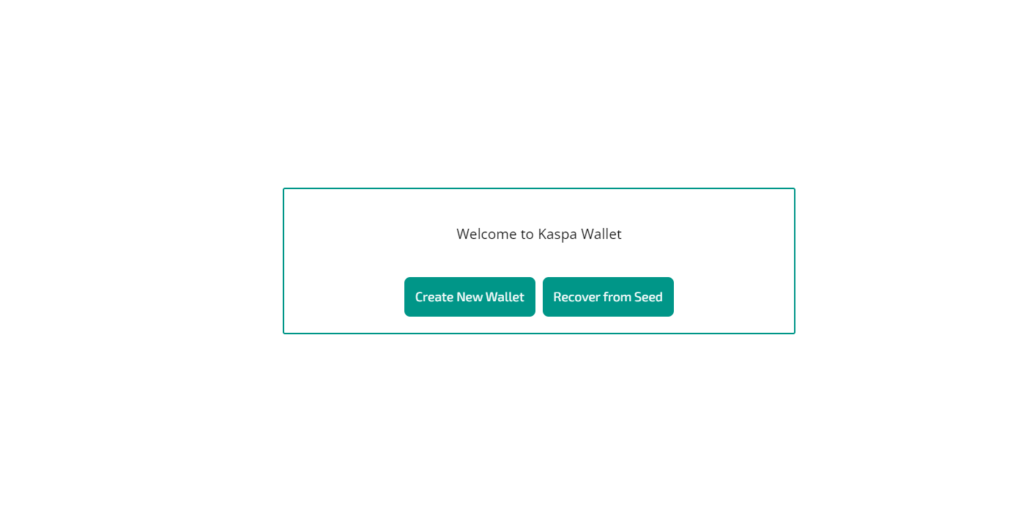
Step 3: Create a New Wallet
Go to https://wallet.kaspanet.io/.
Hit ‘Create New Wallet’, and choose the password for a new kaspa wallet.
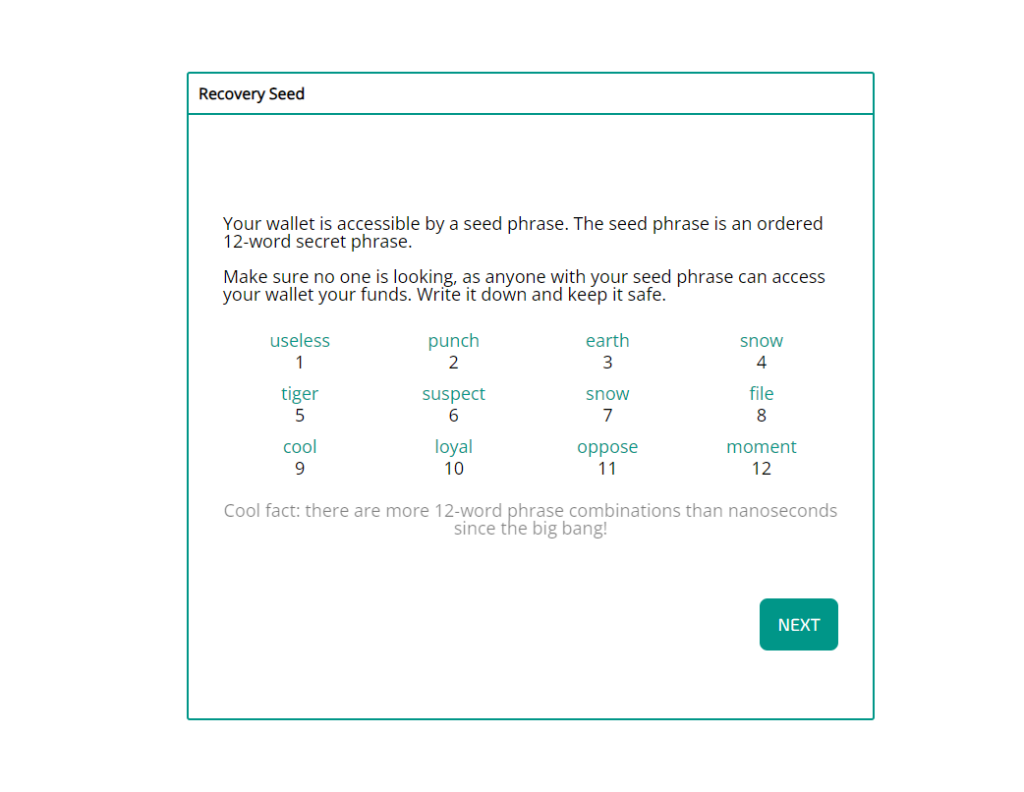
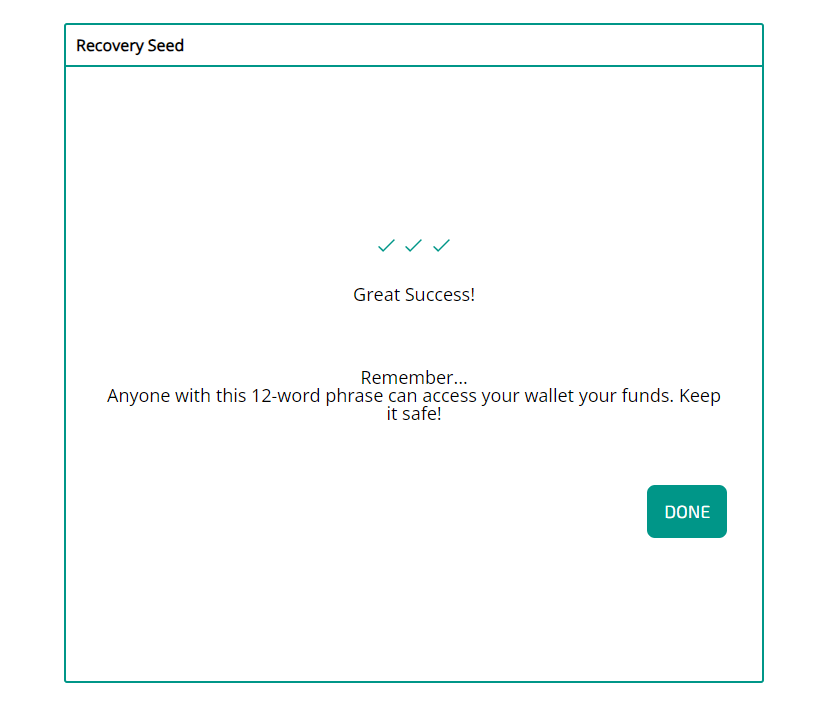
After that wallet will generate a seed phrase, allowing us to restore the wallet that we lost access to. Take this seed phrase and write it. Never tell, write or in any way reveal your seed phrase to anybody.
Keep these 12 words secure, as they are essential for recovering your wallet. Keep them private; if someone learns your phrase, they could access and take all your funds.
The wallet software will ask you to enter the seed phrase for confirmation. It is to make sure that the seed phrase has been backed up appropriately.
Congratulations! You have successfully created your first Kaspa wallet. You can now send and receive $KAS.
Step 4: Access to Kaspa Wallet
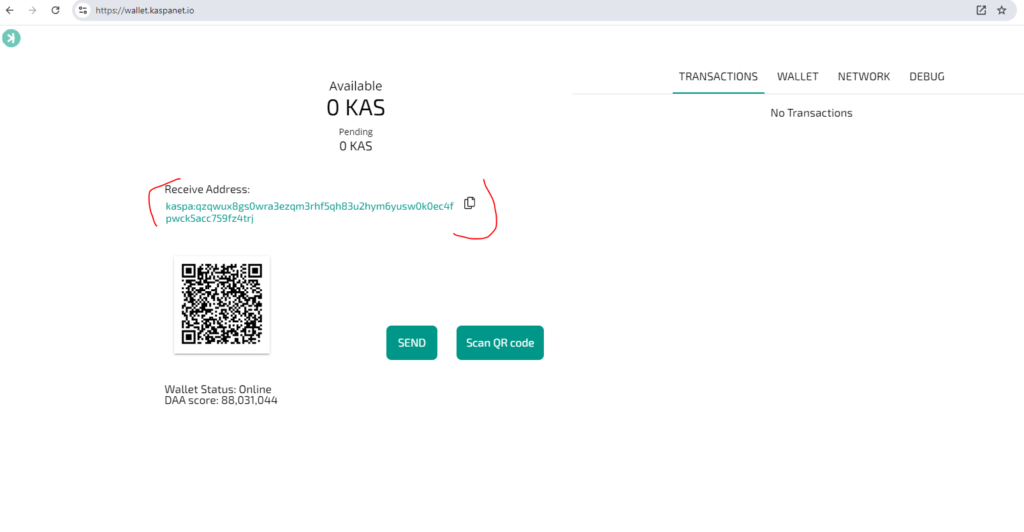
Since you have set up your wallet you will be able to get your Kaspa Address which you can use to receive Kaspa tokens.
The wallet interface shows the balance, transactions, history, and options to initiate token sending and receiving.
Step 5: Sending and Receiving Kaspa
Once your wallet has been created and funded, you are ready to begin the interaction.
Receiving Kaspa
To receive Kaspa, simply give your wallet address to the sender you want to transact with. Your address is found in the ‘Transactions’ tab of the wallet.
Example of Address: kaspa:qzqwux8gs0wra3ezqm3rhf5qh83u2hym6yusw0k0ec4fpwck5acc759fz4trj
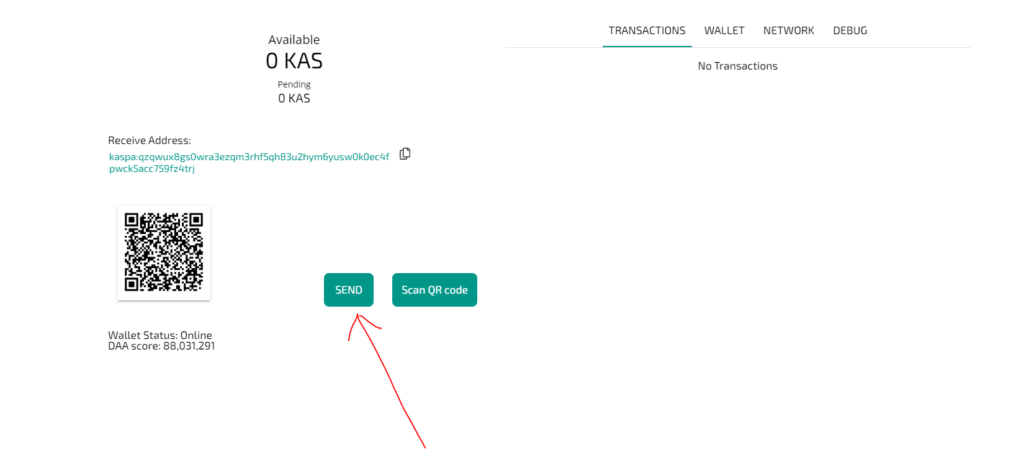
Sending Kaspa
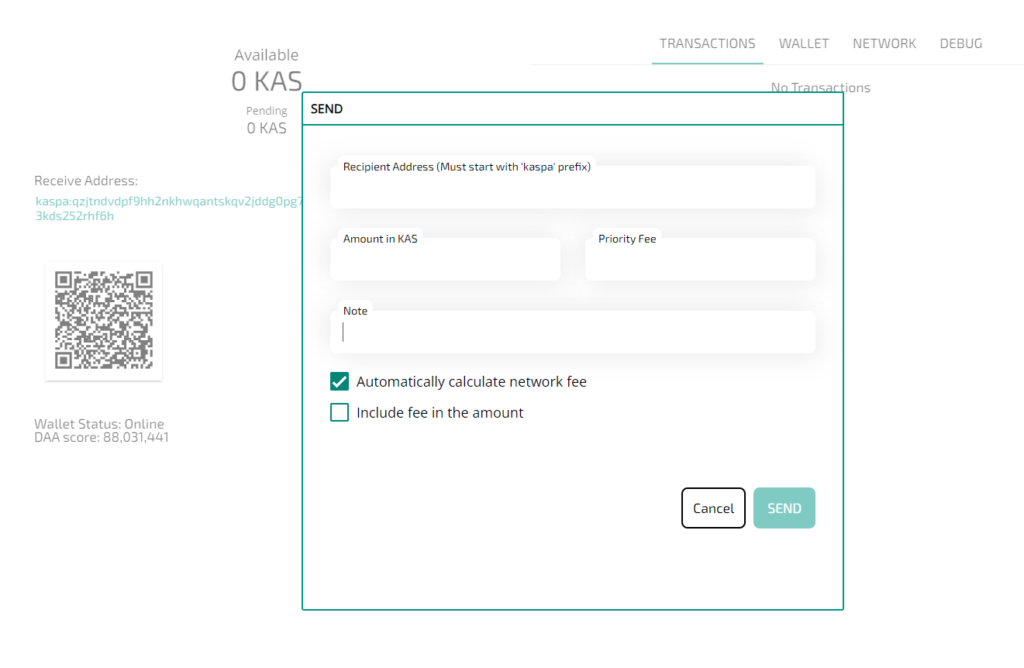
The first step is to click the “send” option.
After the popup opens, enter the recipient’s information to send $KAS.
Conclusion
In conclusion, make sure to set up a secure Kaspa wallet before diving into the Kaspa ecosystem
Whether you choose a desktop, mobile, or hardware wallet, always protect your seed phrase and password.
With your wallet ready, you’ll be all set to explore Kaspa’s potential.
If you liked this article, then please subscribe to our YouTube Channel for Kaspa video tutorials. You can also find us on Twitter and Instagram.